

Provisioning quickstart#
Use this guide to create a first policy-gated Resource with a customer-owned runner and Terraform state.
Navigate: left navigation → Provisioning.
What you need#
Before opening Reply CMP, prepare:
a GitHub or Azure DevOps repository where you can commit the runner files;
an Azure subscription containing an existing Storage account and private Blob container for Terraform state;
an active read-write Azure Connection in Reply CMP whose service principal can manage the target resources and read, write and lease blobs in that container;
permission in Reply CMP to manage Provisioning modules, credentials and Deployments;
permission to configure the selected pipeline or workflow.
Choose the package that matches your runner. Each ZIP contains the complete runner contract and two small Azure modules. The first creates a Resource Group; the second creates a Storage Account and demonstrates a typed intra-Deployment reference.
Includes azure-pipelines.yml, runner scripts and two locked example modules.
Includes the Actions workflow, runner scripts and the same two example modules.
Important
Keep the runner files on a protected branch. Never commit PATs, private keys, Terraform state, plans, tfvars, storage keys or SAS tokens.
1. Prepare the repository#
Extract the ZIP into an empty repository.
Review and commit all files, including
.terraform.lock.hclfiles.Push to a protected branch such as
main.Create the pipeline or enable the workflow described in the package
README.md.
The starter already pins the production Reply CMP endpoint in the protected runner file. Do not move the pin into a secret or runtime dispatch input. Change it only when Reply CMP support gives you an explicit non-production endpoint.
The sample modules are in registry/modules/azure-resource-group and registry/modules/azure-storage-account. Create protected tags for their first versions:
git tag module/azure-resource-group/v1.0.0
git tag module/azure-storage/v1.0.0
git push origin module/azure-resource-group/v1.0.0
git push origin module/azure-storage/v1.0.0
2. Prepare the state container#
Reply CMP connects an existing Azure Blob container; it does not create one.
Confirm that the Storage account has:
Microsoft Entra authentication only and shared-key access disabled;
anonymous Blob access disabled and a private state container;
secure HTTPS traffic only;
TLS 1.2 or later;
Blob versioning enabled;
Blob and container soft delete enabled for at least 14 days;
network access from the selected runner.
The endpoint may be public or private. Use a public endpoint with a hosted runner, or a private endpoint/firewall with a runner that has the required network path. In both cases state access remains private and requires Microsoft Entra authorization.
Grant the Azure Connection service principal Storage Blob Data Contributor at the narrowest practical scope, normally the state container, plus management-plane read access to inspect its protections. Do not create a state blob name: Reply CMP generates a unique key for the Deployment.
3. Store the repository or dispatch credential#
Open Provisioning → Module registry → Credentials → Add credential.
Enter a purpose-based name, such as
ado-provisioningorgithub-provisioning.Choose the credential type.
Enter the secret once.
Optionally choose the next rotation date.
Select Store credential.
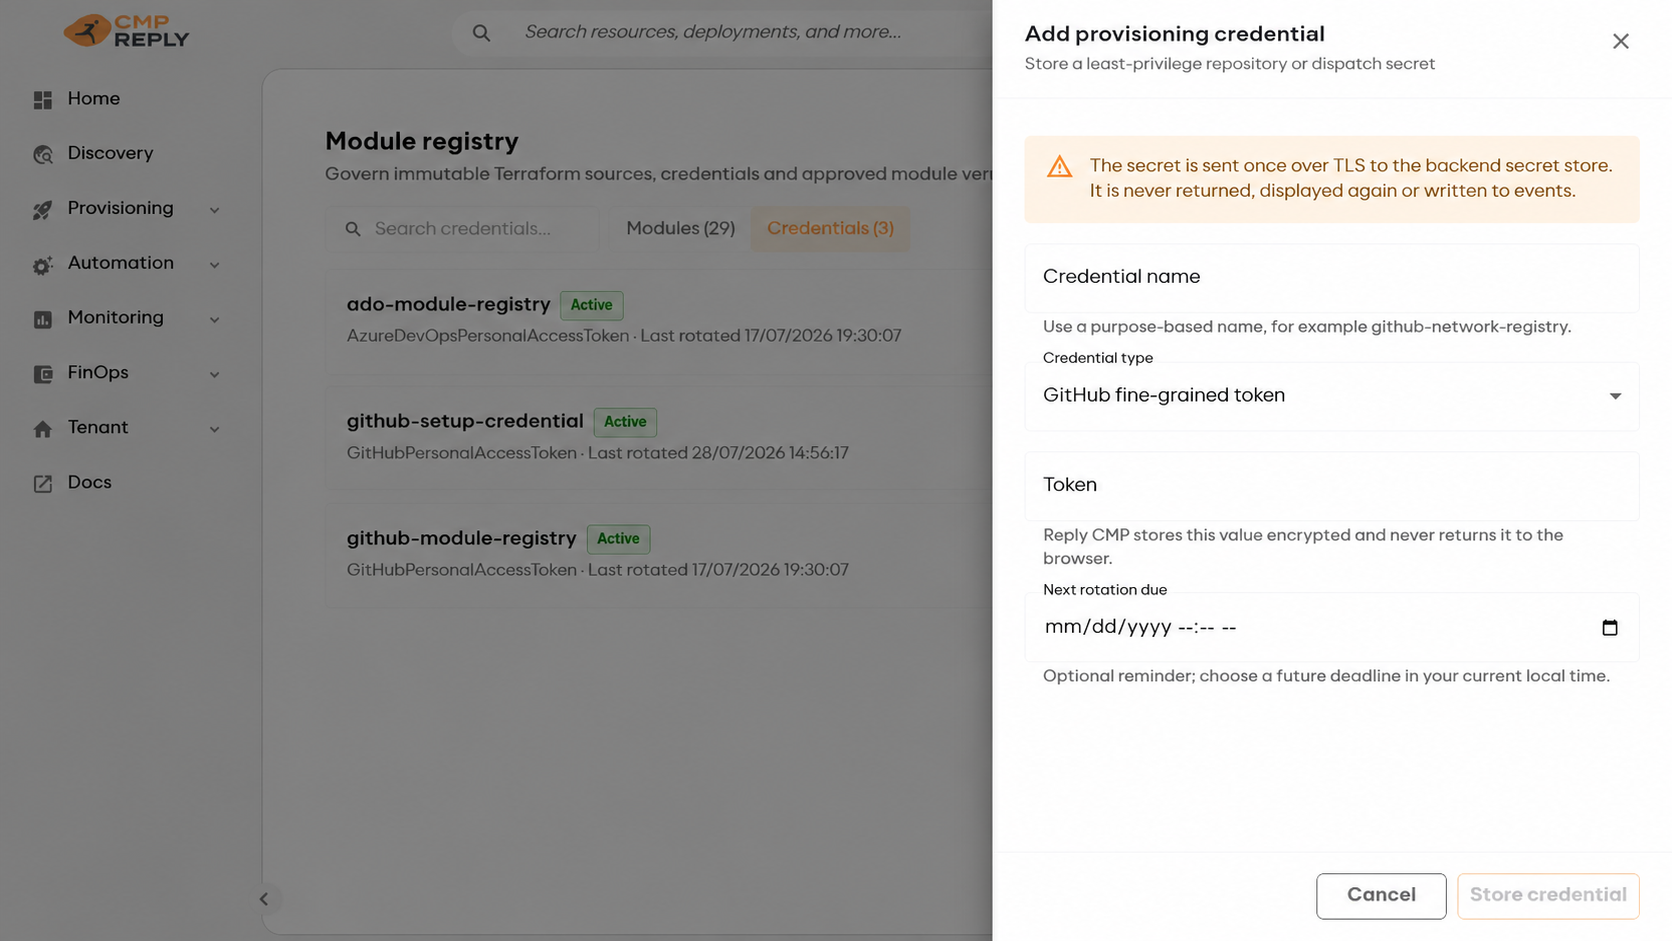
Secret values are accepted once and are never displayed again.#
For a private module repository, this credential reads source. For a runner, it starts only the configured pipeline or workflow. Terraform never receives it.
4. Register the example modules#
Open Module registry → Modules → Register module.
Register the Resource Group first. Enter:
a stable module name, for example
azure-resource-group;display name
Azure Resource Group;cloud provider Azure;
the repository provider and repository root URL;
module path
registry/modules/azure-resource-group;default ref
main;the credential created above when the repository is private.
Registration creates one module record for this one path; it does not register every folder in the repository. You do not enter a schema during registration. Reply CMP reads the committed schema.json when you add a version.
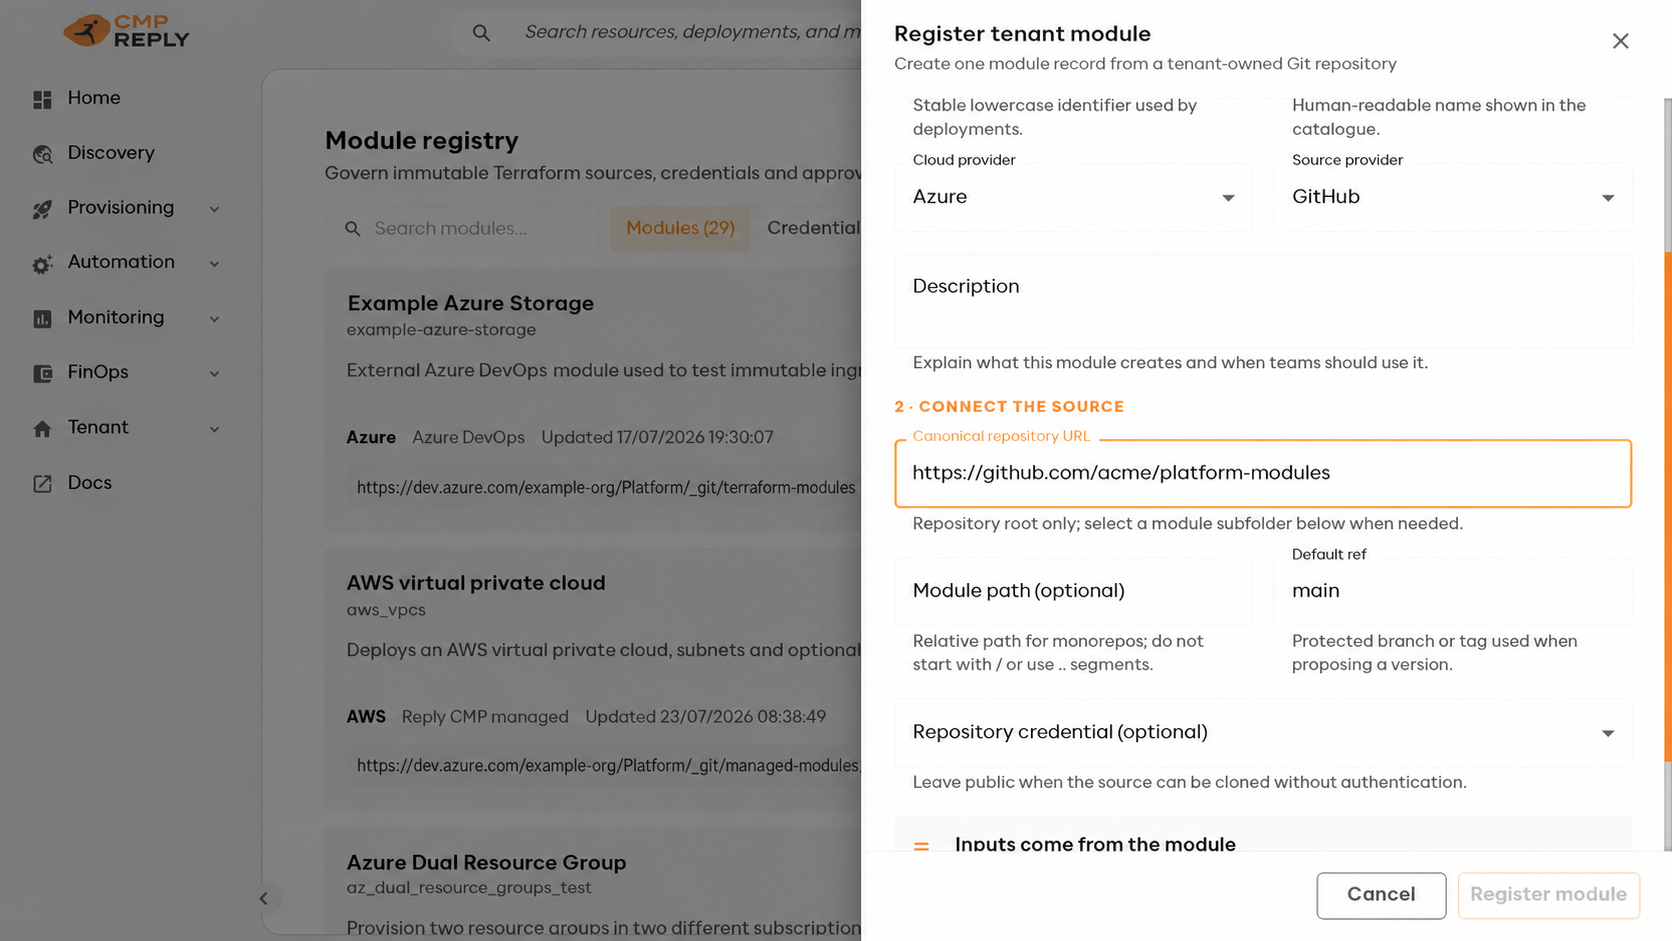
The repository URL points to the repository root; Module path identifies the reusable Terraform folder.#
Open the new module and select Add version:
enter version
1.0.0;enter the complete tag ref
refs/tags/module/azure-resource-group/v1.0.0;keep Terraform
1.15.8;submit the version, inspect its exact commit and validation evidence, then approve it.
Reply CMP reads schema.json and .terraform.lock.hcl from the selected commit. There is no checksum field to complete in the UI.
Repeat the registration for:
module name
azure-storage-account;display name
Azure Storage account;module path
registry/modules/azure-storage-account;version
1.0.0;ref
refs/tags/module/azure-storage/v1.0.0.
Use the complete refs/tags/... value for both GitHub and Azure DevOps. This avoids
an Azure DevOps tag being interpreted as a branch with the same short name.
The starter Storage module derives its globally unique Azure name from the Reply CMP resource name plus a stable tenant-and-Deployment digest. You can use a clear resource name in the portal; you do not need to invent a globally unique Storage Account name.
5. Create a Deployment#
Open Provisioning → Deployments → New deployment.
Enter a unique name and a region label used for filtering.
Select at least one cloud Connection.
When the same provider is connected more than once, give each connection a clear alias such as
default,networkordata.Select Create deployment.
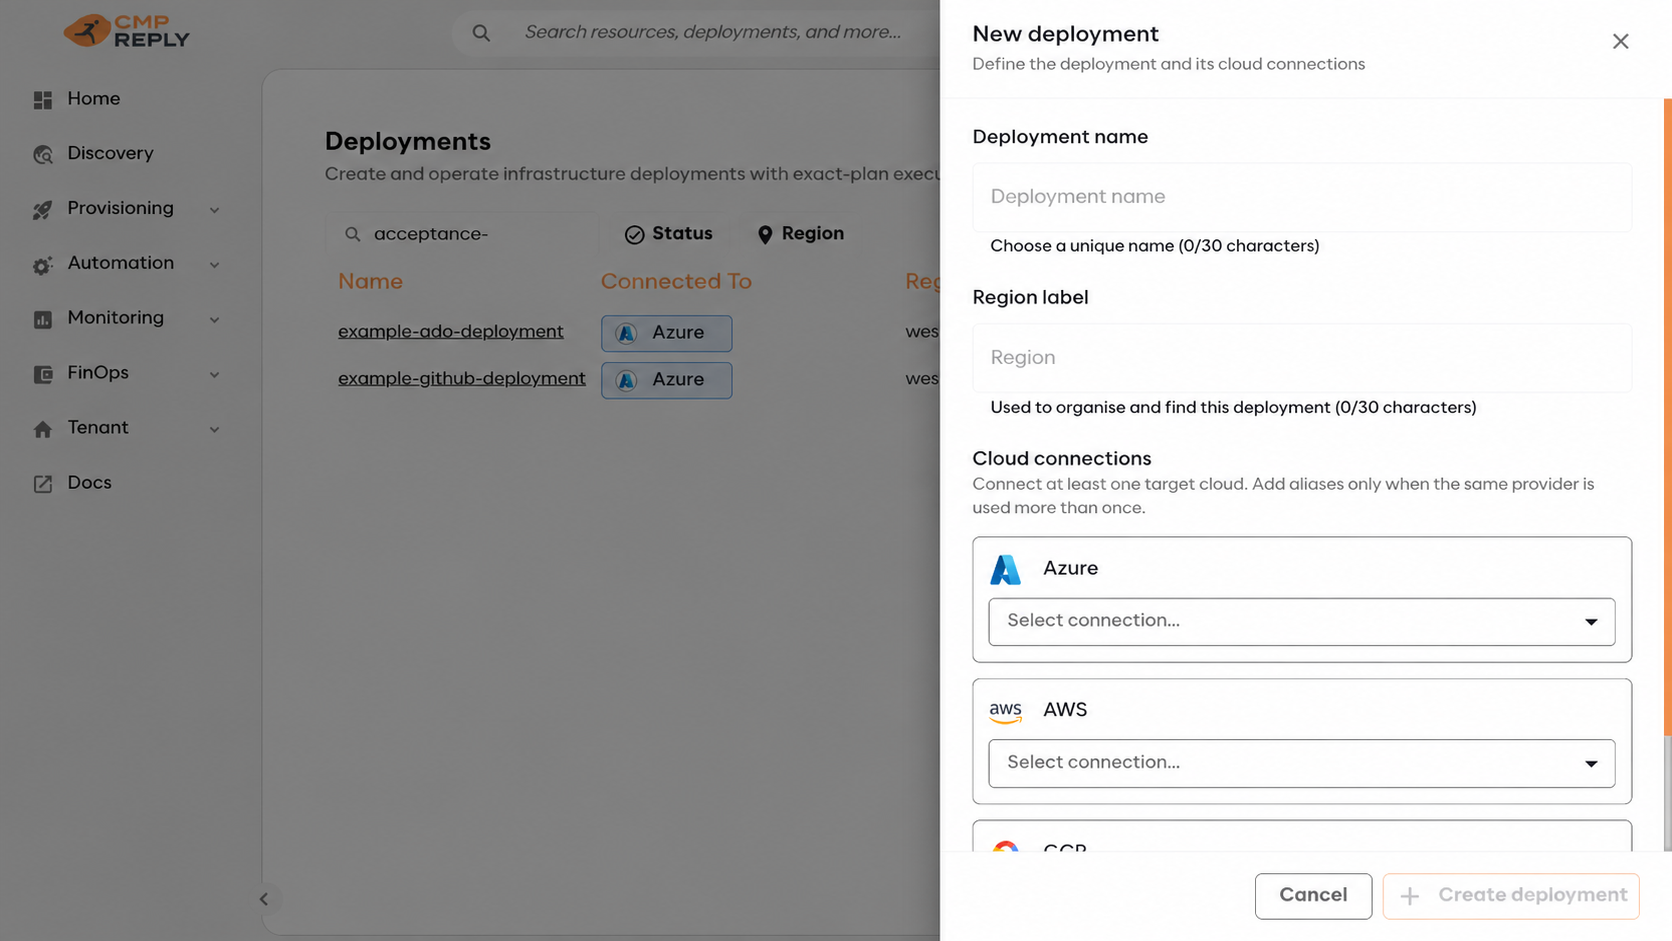
Cloud Connections can be selected during creation and changed later from Resources.#
Reply CMP opens the new Deployment on Runner & state. Plan and Apply remain unavailable until both sections are ready.
6. Connect the runner#
Select Change runner and choose Azure DevOps or GitHub Actions.
Select the stored Azure DevOps credential.
Select or type the organisation, project and numeric pipeline ID.
Under Secretless Reply CMP callback, select Set up callback. Reply CMP creates or reuses the tenant claim identity and a callback-only service connection.
When the card turns green, select Use runner.
If automatic connection creation fails, the panel reveals the exact values and steps for creating a draft workload-identity connection manually. Do not create a client secret.
Select the stored GitHub credential, repository, workflow path and protected branch.
Select Set up environment. Reply CMP creates a protected callback-only Environment for that exact branch.
Keep
id-token: writein the workflow. No cloud Connection secret or Azure coordinate is stored in GitHub.Select Use runner.
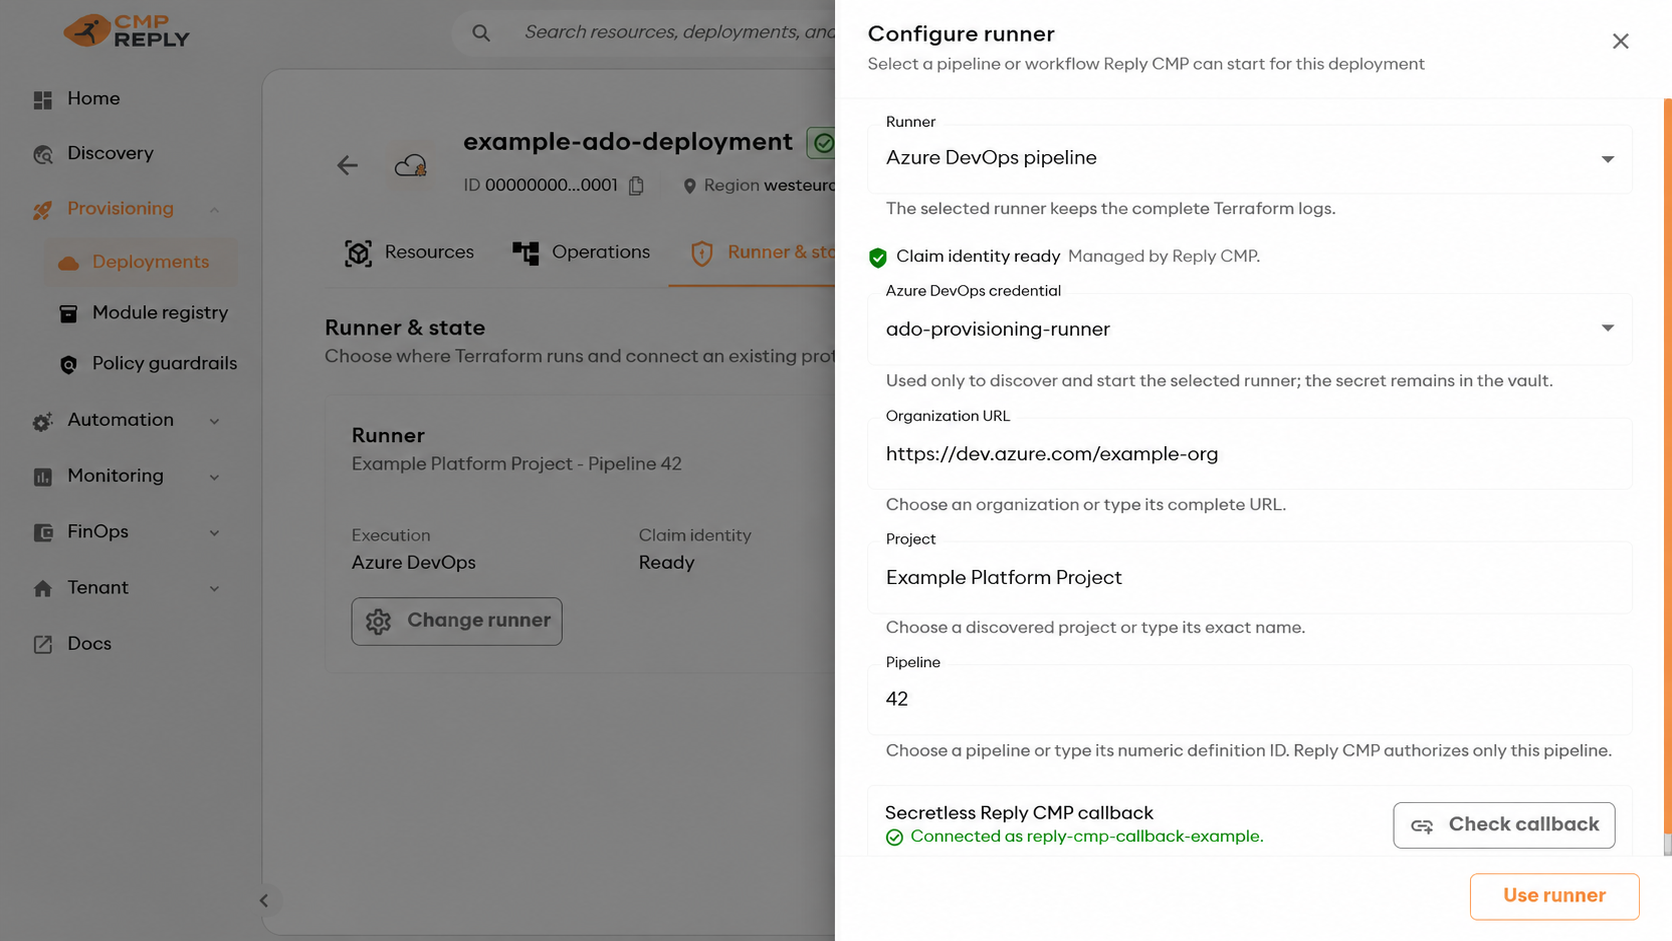
Dropdowns are editable: choose a discovered value or type the exact value when discovery is unavailable.#
7. Connect Terraform state#
Select Change state.
Select one of the active read-write Azure Connections already linked to the Deployment. If several exist, choose the intended alias.
Select the resource group, Storage account and Blob container.
Check State authentication. It shows the Connection alias whose exact vault credential version will authenticate the runner.
Select Validate storage.
Correct any failed protection, validate again, then select Use state.
Select Save configuration on the Runner & state page.
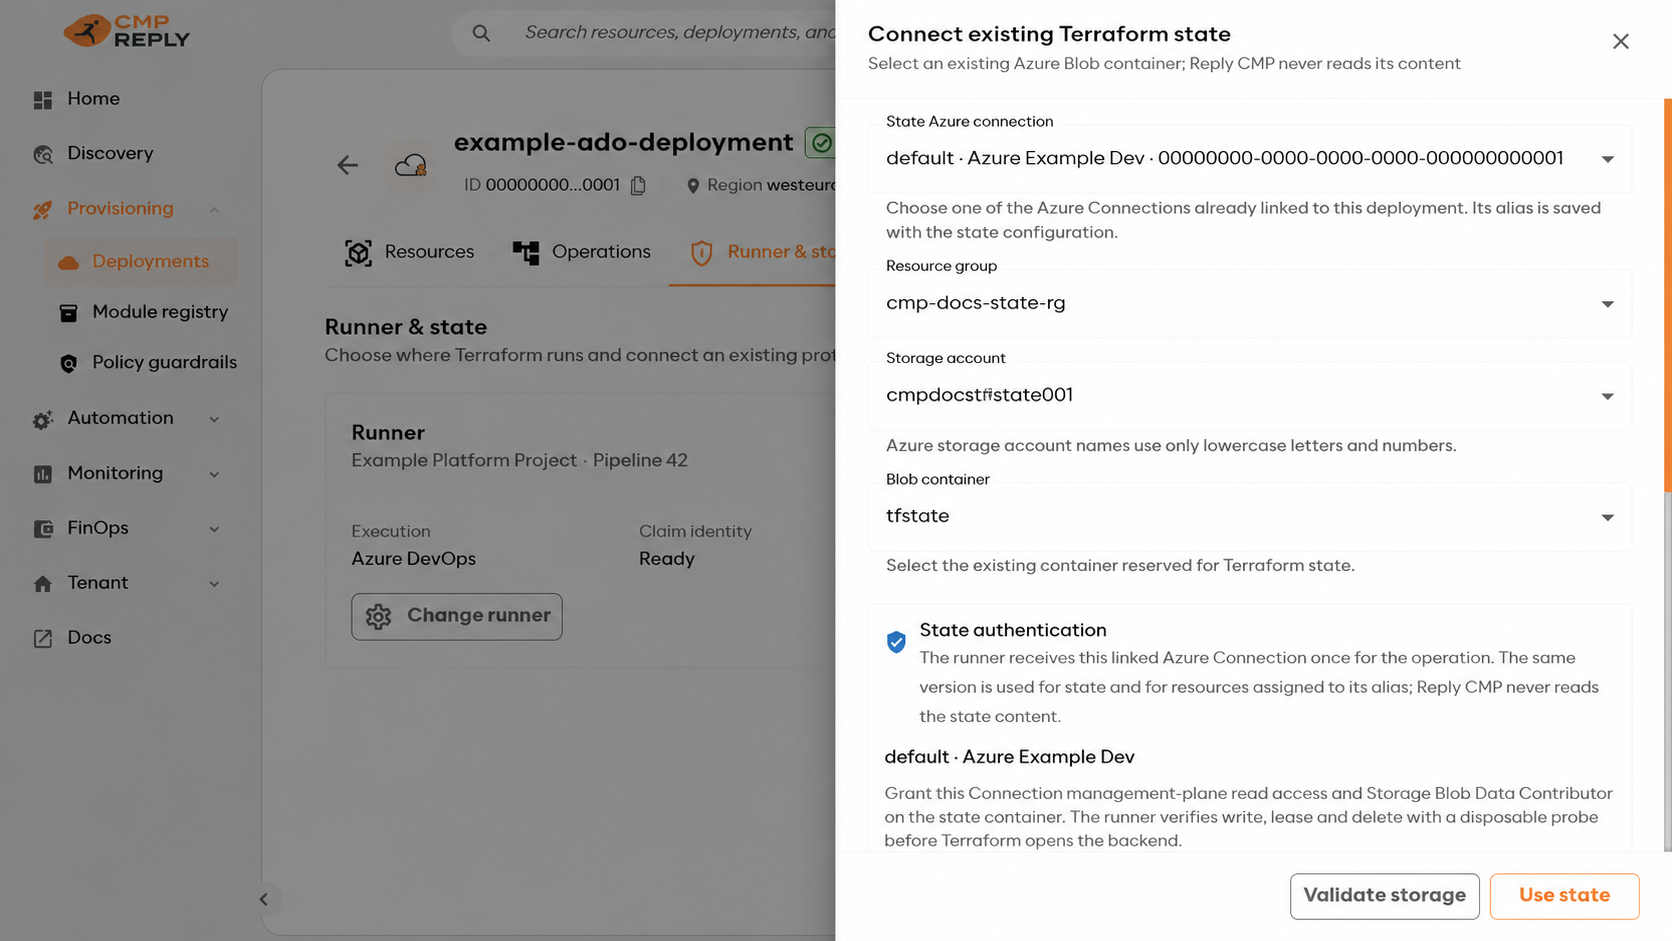
The selected Connection is used for both its Azure provider alias and state. No storage key, SAS token, connection string or runner-side cloud secret is entered.#
If another Deployment already uses the intended runner and Storage account, Reuse setup can prefill both sections. The new Deployment still receives its own state key and operation history.
8. Create a guardrail and Resources#
Open Provisioning → Policy guardrails → New guardrail. For a safe first rule:
choose Limit resource deletions;
set maximum deletions to
0;choose Block apply;
enter a clear name and leave the guardrail enabled;
select Create guardrail.
Return to the Deployment → Resources → Create resource:
select the approved Azure Resource Group module and enter a short lowercase prefix;
save the Resource; it remains
Draft;create a second Resource from the approved Azure Storage account module;
for Resource group, choose In deployment and select the Resource Group created in the previous step;
save the Storage Account Resource.
The form stores a typed reference, not the current Resource Group name. Reply CMP generates the Terraform expression and dependency, so both Resources can be planned and applied together.
9. Plan and Apply#
Select the rocket action in the Deployment header.
Enable Plan only and confirm the runner and state shown in the panel.
Start the operation.
Open Operations, expand the newest entry and review the policy result.
Select Open runner run to open the exact Azure DevOps pipeline run or GitHub Actions run. Inspect the complete, color-preserving Terraform output grouped by phase there.
If the plan is correct, open the action again with Plan only disabled and start Apply.
Confirm the Resource becomes
Latestand the Deployment becomesValid.
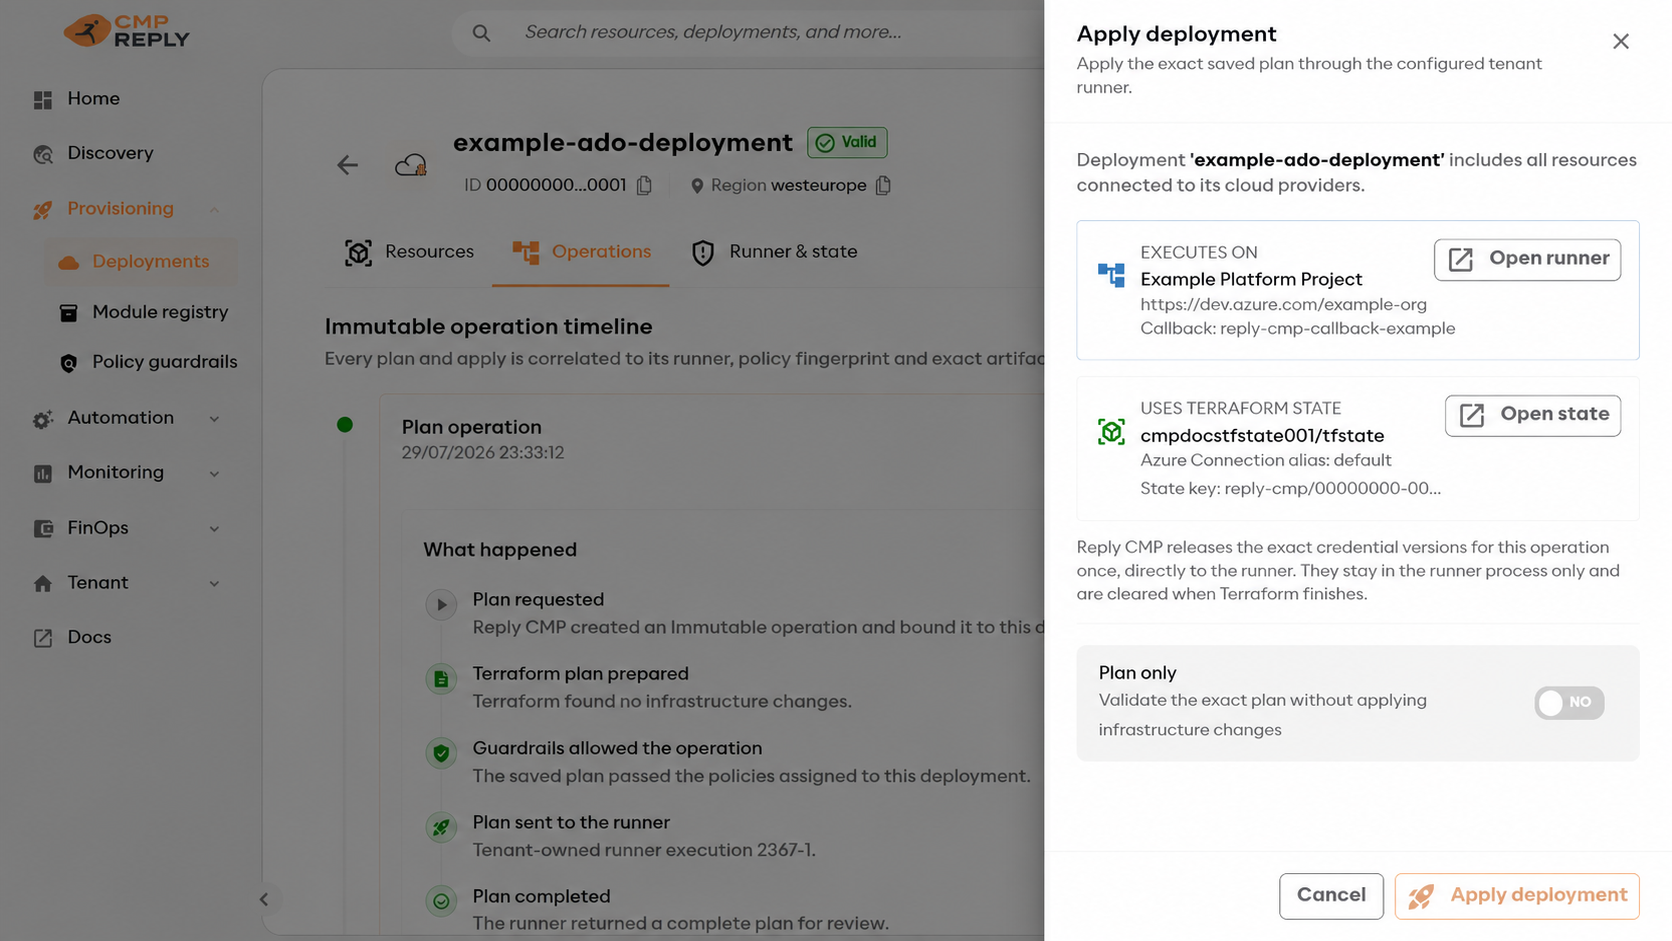
Always verify the runner and state before starting an operation.#
For an existing Deployment that already has live resources, do not start Apply until you have completed the legacy state migration.